Spring Boot Application

How to create a Spring Boot Application
Following is the very minimum you have to do, to make any Java application a Spring Boot application,
1. Create a main class extending from the SpringBootServletInitializer class.
2. Add the @SpringBootApplication annotation to that class.
Let’s look at each step in detail.
1. The Main class
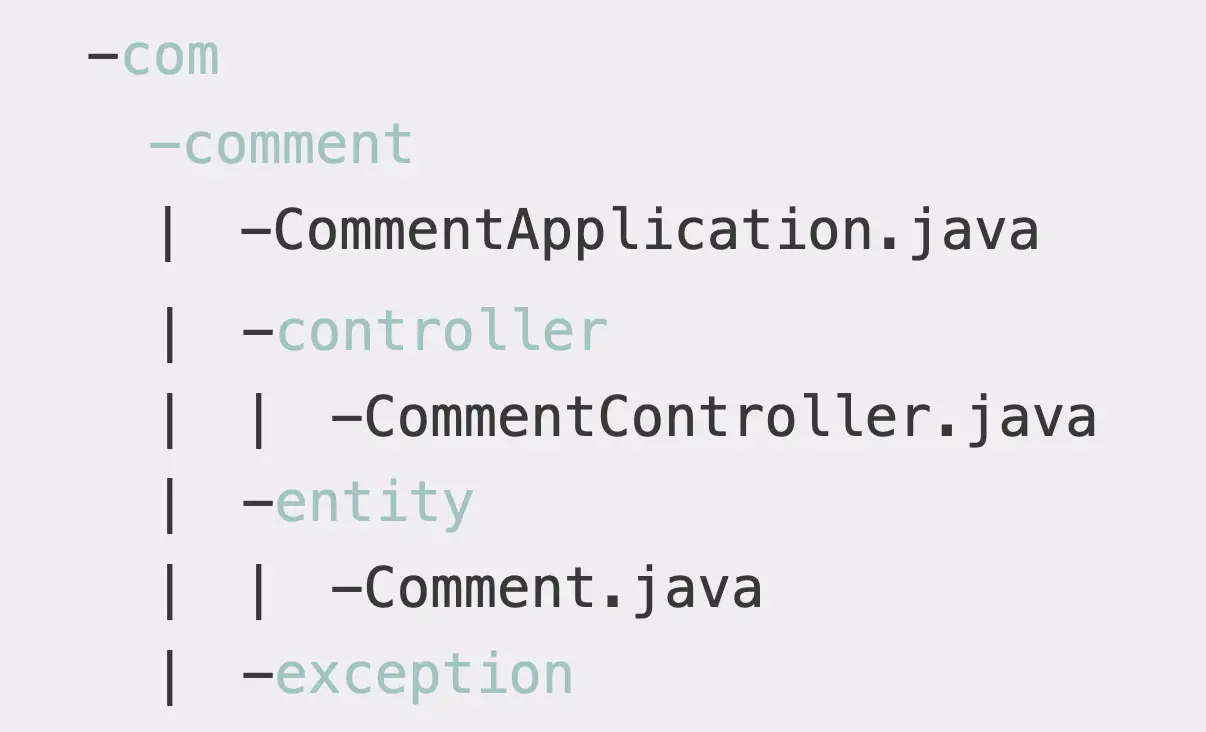
First, create a main class, you can give any name to it, so I’ll name it CommentApplication.
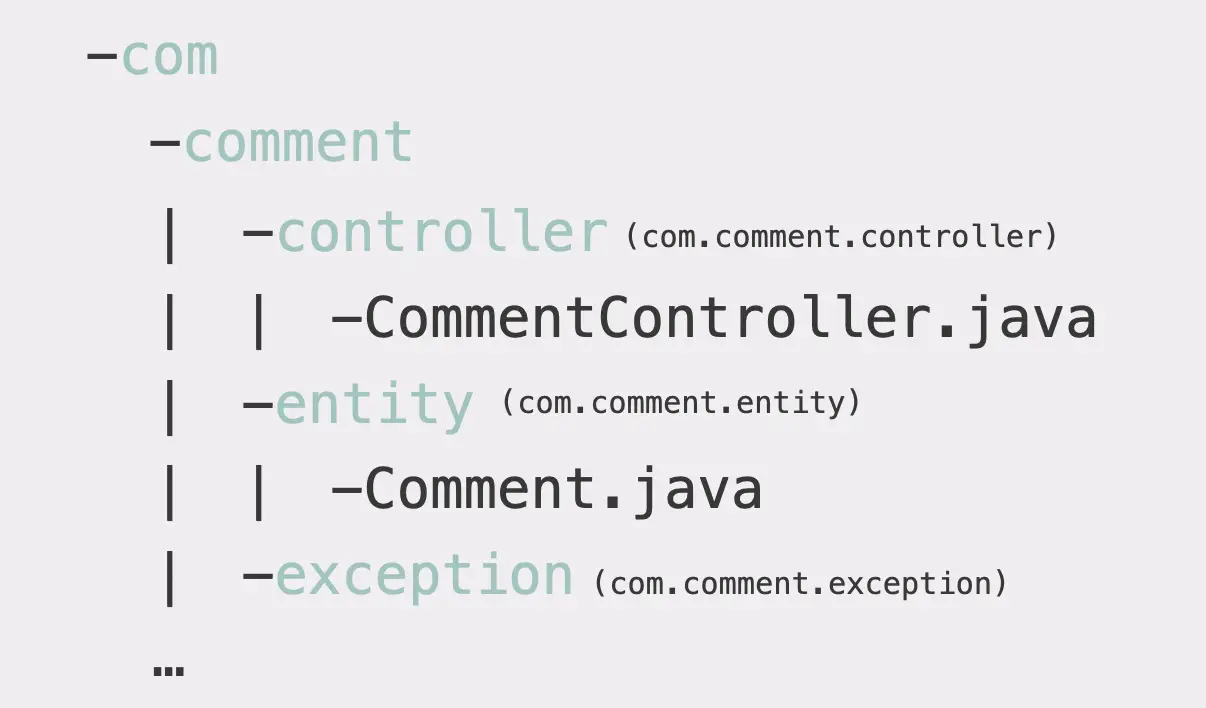
This main class should be placed in the root package, this allows for component scan to apply to the whole project. So, the package structure of this project looks like below at the moment.

So the root package is com.comment, and this is where I want to place the main class in.

2. The @SpringBootApplication Annotation
This is a convenience annotation that is equivalent to declaring the following 3 annotations.
@EnableAutoConfiguration
@ComponentScan
@Configuration.
So What do they do? Let’s look at each of the annotations.
@EnableAutoConfiguration
As the name suggests, this enables the auto-configuration of the Spring Application Context, attempting to guess and configure beans that you are likely to need.
If you have worked with a typical Spring application, you should be familiar with all the configurations that are needed such as, data sources, entity manager factories, dispatcher servlets and the list goes on… ![]()
By enabling auto-configuration, the Spring Boot framework kind of looks at the jar dependencies that you have added and the existing configurations for the application if there is any, and then based on these, automatically configure your Spring application.
For example, if H2 is on your classpath, and you have not manually configured any database connection beans, then Spring Boot auto-configures an in-memory database. How convenient is that? ![]()
@ComponentScan
This is the annotation that we can use to tell the Spring framework where to scan for beans, i.e. basically the classes annotated with @Component, @Service or @Repository.
So when this annotation is on a particular class, the package of that class and all of its sub-packages will be scanned for beans. That’s why we want to place the main class in the root package so that all the beans could be found.
@Configuration
This allows registering extra beans in the context. Spring Boot favours Java-based configuration, and in the documentation, it is said that,
Although it is possible to use SpringApplication with XML sources, we generally recommend that your primary source be a single @Configuration class. Usually, the class that defines the main method is a good candidate as the primary @Configuration. — Spring Boot Reference Guide
3. The main Method
Next, you should add the main method to the class. Here we delegate to the static run() method of the SpringApplication class, providing the main class and args as parameters to launch the application.
package com.comment;

import org.springframework.boot.SpringApplication;
import org.springframework.boot.autoconfigure.SpringBootApplication;

@SpringBootApplication
public class Application {

    public static void main(String[] args) {
        SpringApplication.run(Application.class, args);
      }

}
Spring Boot Application Annotations in Controller, Service, and Repository layers
The Controller
In Spring’s approach to building RESTful web services, HTTP requests are handled by a controller. — Spring | Guides
But then, how is this controller identified by the framework?
Annotations of course!
@Restcontroller
When you annotate the Controller class with the @Restcontroller annotation, Spring Boot will pick it up as a resource controller to serve the incoming HTTP requests.
@Restcontroller is a convenience annotation that is itself annotated with @Controller and @ResponseBody.
@ResponseBody indicates that a method’s return value will be sent in the response body. Because this is at the class level, it applies to every method in the controller.
@Controller indicates that the class is a controller, and it is itself annotated with @Component
Controller method annoatations
The framework should know which method to be called depending on the HTTP method (i.e. GET, POST, or DELETE) and the URI of the request.
There are a few annotations that can be used for this.
There is @RequestMapping annotation which can be used on both class level and method level.
Following are the HTTP method specific variants, which are method level annotations.
@GetMapping@PostMapping@PutMapping@DeleteMapping@PatchMapping
If the request URI contains a path parameter, it should be annotated with @PathVariable in the method parameter.
Example request URI and the matching Controller method
Request URI: /posts/1/comments
package com.comment.controller;

import org.springframework.web.bind.annotation.GetMapping;
import org.springframework.web.bind.annotation.PathVariable;
import org.springframework.web.bind.annotation.RestController;

import com.comment.entity.Comment;

@RestController
public class CommentController {


  @GetMapping("/posts/{id}/comments")
  public List<Comment> getCommentsByPostId(@PathVariable("id") int postId) {

    //return a list of comments here;
  }

}
The Service
A Service class should also be annotated for it to be eligible for auto-wiring.
There is the @Component annotation which indicates that a class is a “component” and it is considered as a candidate for auto-detection when using annotation-based configuration and classpath scanning.
@Componentis a generic stereotype for any Spring-managed component.@Repository,@Service, and@Controllerare specializations of@Componentfor more specific use cases (in the persistence, service, and presentation layers, respectively). Therefore, you can annotate your component classes with@Component, but, by annotating them with@Repository,@Service, or@Controllerinstead, your classes are more properly suited for processing by tools or associating with aspects. For example, these stereotype annotations make ideal targets for pointcuts.@Repository,@Service, and@Controllercan also carry additional semantics in future releases of the Spring Framework. Thus, if you are choosing between using@Componentor@Servicefor your service layer, @Service is clearly the better choice. Similarly, as stated earlier,@Repositoryis already supported as a marker for automatic exception translation in your persistence layer. — Spring Documentation
So, I’d annotate the service class with @Service.
package com.comment.service;

import java.util.List;
import java.util.stream.Collectors;
import java.util.stream.Stream;

import javax.inject.Inject;

import org.springframework.stereotype.Service;

import com.comment.entity.Comment;
import com.comment.repository.CommentRepository;

@Service
public class CommentService {

  @Inject
  private CommentRepository commentRepository;

  public List<Comment> getCommentsByPostId(int postId) {

    try (Stream<Comment> commentsStream = commentRepository.findAllByPostId(postId)) {

      return commentsStream.collect(Collectors.toList());

    }
  }
The Repository
We need the repository that we created to be auto-wired in the service class. Now, if you are wondering how the CommentRepository interface will be injected because interfaces are not instantiated, it is all done by the Spring Data framework.
All I have done to enable the functionality is that I have enabled auto-configuration, which in turn enables JpaRepositories because I have spring-data-JPA as a dependency in the classpath Spring will scan com.comment and all its sub-packages for interfaces extending Repository or one of its sub-interfaces.
For each interface found, the infrastructure registers the persistence technology-specific FactoryBean to create the appropriate proxies that handle invocations of the query methods. Each bean is registered under a bean name that is derived from the interface name — Spring Documentation
So I don’t have to do anything to the comment repository interface, since it extends from CrudRepository which in turn extends from Repository interface, it is already eligible for auto-detection and dependency injection.
But still, I would annotate it with @Repository annotation for semantics.
package com.comment.repository;

import java.util.stream.Stream;

import org.springframework.data.repository.CrudRepository;

import com.comment.entity.Comment;

public interface CommentRepository extends CrudRepository<Comment, Integer> {

  Stream<Comment> findAllByPostId(int postId);

}

