TDD IN JAVA
How it's done - for the Absolute Beginner
<img loading="lazy" class=" mg-2" src="/assets/img/thumb/TDD.svg" alt="Test Driven Development Tutorial" title="Test Driven Development Demo" rel="share" />
In this post, I’ll show you how TDD is done, step by step with a simple example.
So that you will,
Know what TDD is.
Get started with TDD within minutes! YES.
Practise a little bit of TDD every day with TDD KATA!
So Let’s get started.

Contents
WHAT IS TDD?
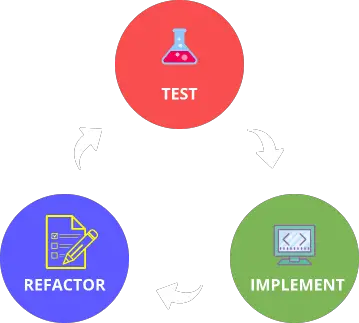
Test driven development or TDD is a development process, where the following three basic steps are repeated until you achieve the desired result.
-
First, you write a failing test.
-
Then write the minimum code to pass the test.
-
Refactor both test and logic.
Can you actually write a test before writing a single line of implementation logic? ![]()
How do you know what method, class, or interface will contain the logic?
Sounds a bit odd…
That’s exactly how I felt when I first read about TDD.
But once I got the hang of it, I realised…
That’s the whole point! ![]()
It guides you through the design.
So don’t worry,
In this post, I’ll demonstrate each step with a simple example.
Step 1
TEST
The first step is to write a failing test.
For that, we must break down the requirements into tiny bite-size pieces.
Pick one of the requirements, and write a test to validate that behaviour.
Let’s see how this is done.

Example
Requirement: I want a function that prints ‘Hello World!’.
This piece of requirement is so small that it need not be broken down further.
Now let’s write a test to validate this behaviour.
So where should we start? ![]()
Start with an assert.
That’s the easiest, and best in my experience.
There are so many assert methods in the JUnit framework.
Which one should I use here?
Well, I almost always use assertThat.
WHY assertThat()?
assertThat when combined with hamcrest matchers, can replace all others.
It is also a lot better than all other assert methods in the JUnit framework.
In this JUnit4 Tutorial, I explain the benefits and uses of assertThat() with examples.
assertThat(actual, matcher);
There are two parameters we need to pass into this method.
-
The first parameter is the ‘actual’ or the return value from the method under test.
We don’t have a method yet!
So, we got to think backwards here.
Normally what happens is, there is a class with a method in it. When we want to call the method, we create an object of that class and call the method on that object.
     Example example = new Example();

     example.method();
There’s neither a class nor a method in this case.
Thinking backwards, I’ll start with the method. Looking at the requirement, we are going to test whether the method returns the string ‘Hello world!’.
So, I’ll name this method
getMessage(). We can always change these names later.Now we need an object to call this method on.
To create an object, there has to be a Type (a Class or an Interface). The class hasn’t been created yet, but we sure can give it a name.
I’ll start with the object and name it greeting.
greeting.getMessage()So now the first parameter is all set, but we still got to create this object and initialize it to get this test compiling.
Greeting greeting = new Greeting(); -
The second parameter is a matcher, which is an expression, built of
org.hamcrest.Matchers, specifying allowed values.So the method I’m going to use here is
isfrom hamcrest -org.hamcrest.CoreMatcherswhich returns theMatcher.The expected value is the
String“Hello world!”, so I’ll pass it into theis()method.
If you want to learn more about using hamcrest matchers, check out my JUnit4 Tutorial.
Finally, the assert is ready.
assertThat(greeting.getMessage(), is("Hello world!"));
There are a couple of things to note here:
-
To get this test to compile, we’ll have to create a class and add the method
getMessage()in it.But make sure not to write anything more than what is needed to get the test compiling.
-
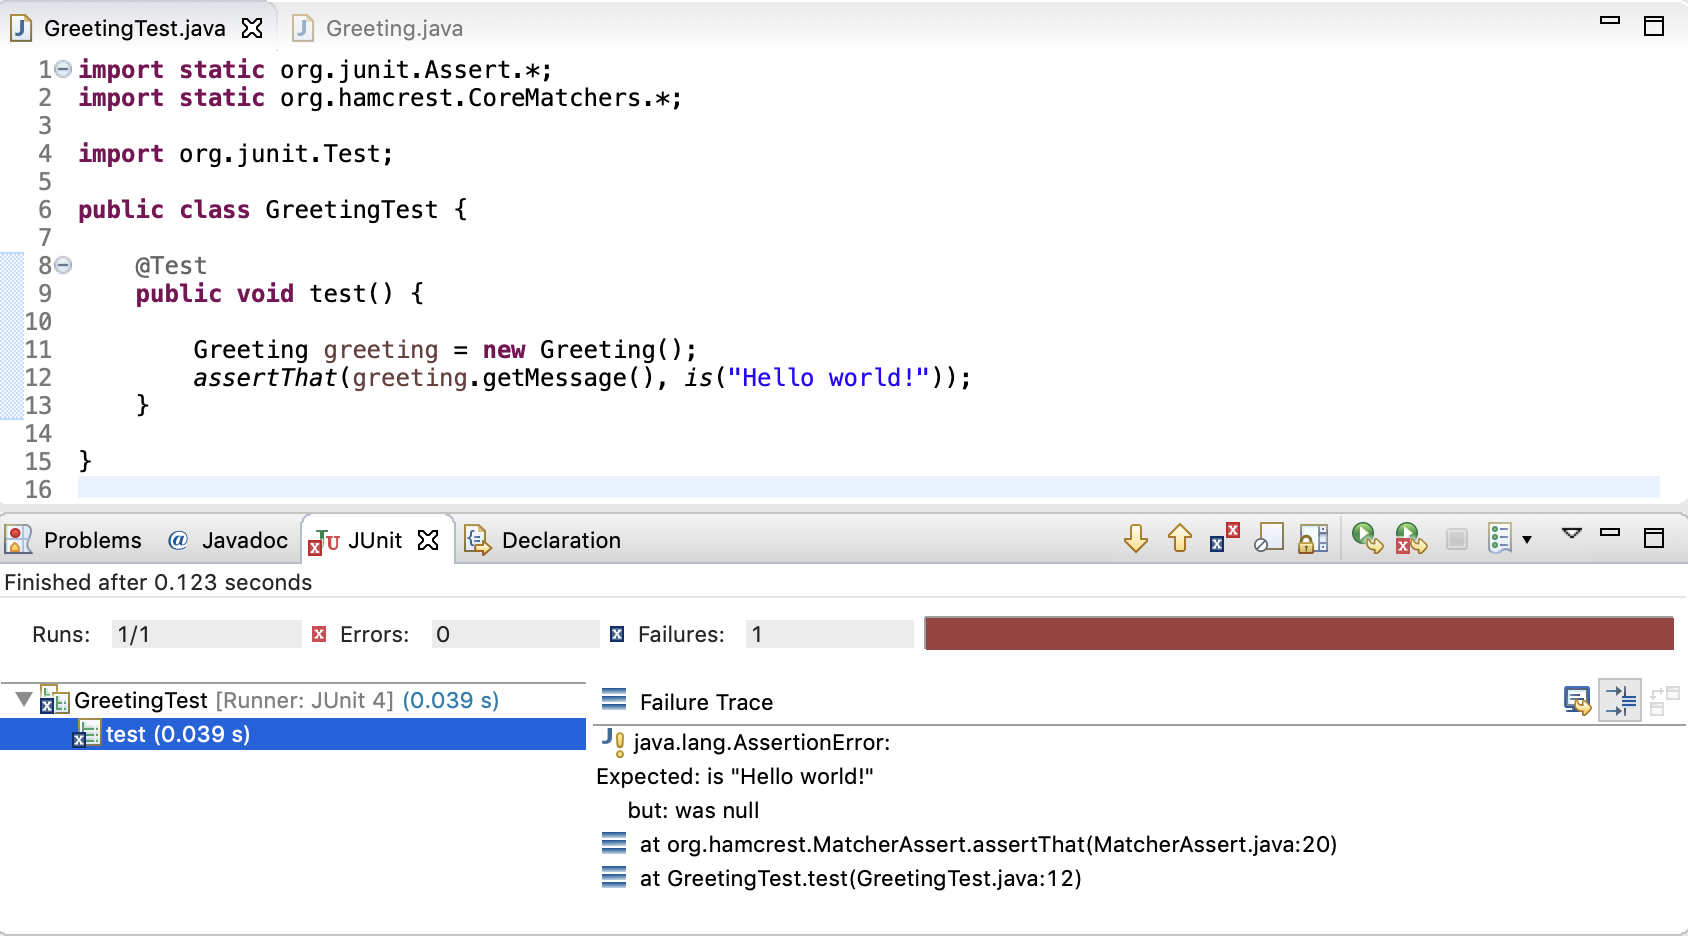
We should make sure to run the test and see that it fails.
Because:
-
It rules out the possibility that the new test will always pass because it is flawed.
-
To make sure that the new test does not pass without requiring new code (because the required behaviour already exists).
-
Here’s the failing test:
   public void test(){

      Greeting greeting = new Greeting();

      assertThat(greeting.getMessage(), is("Hello world!"));
   }

Step 2
IMPLEMENTATION
Write the minimum code to pass the test.
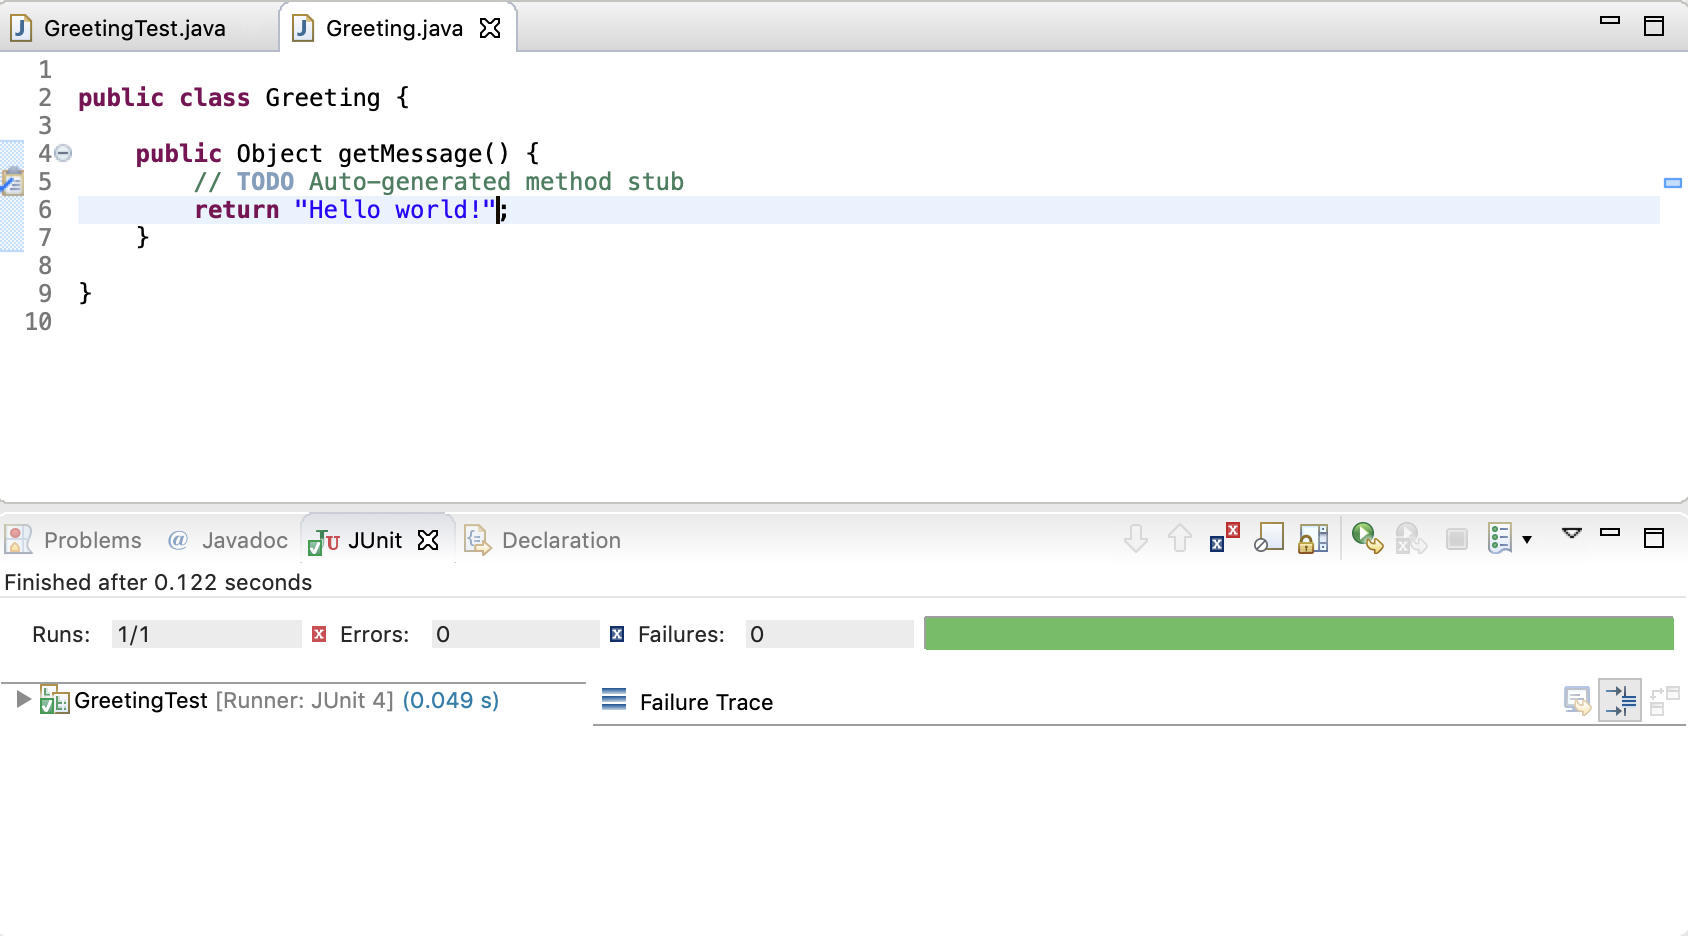
Run the test and see it pass!

As a result of Writing the test, and getting it to compile, we have the skeleton of the implementation.
Here’s what we have so far:
public class Greeting {

  public Object getMessage() {
    // TODO Auto-generated method stub
    return null;
  }

}
The very minimum we have to do to pass the test is to return “Hello world!” instead of null.
Here’s the implementation
public class Greeting {

  public Object getMessage() {
    // TODO Auto-generated method stub
    return "Hello world!";
  }

}
It may look dodgy, ugly and you might be itching to do a little bit more here ![]() . But be patient, we only want to get the test passing at this stage.
We will definitely refactor this in the next step.
. But be patient, we only want to get the test passing at this stage.
We will definitely refactor this in the next step.
Run the TEST!

Now that we have a passing test, it’s time for the next step.
Step 3
REFACTORING
Refactor the IMPLEMENTATION.
Refactor the TEST.
After each and every change, run the test to make sure it passes.

This step is as important as the two above. Refactoring both implementation and test is crucial.
Why should you care about the tests?
You’ll see the answer later in the section Quality Matters.
Refactoring the Implementation
The existing implementation definitely needs some dusting and refactoring.
So I’m going to do the following:
- Remove the auto-generated comment.
- Change the return value from
ObjecttoString. - Extract the String “Hello world” into a field.
- Initialize the field in the constructor - this step is optional, actually, it would be better off without this. But I have included this just so we see that refactoring the implementation may result in changes to the test as well.
Make sure to run the test after each change.
The Implementation
Before
  public class Greeting {

    public Object getMessage() {
      // TODO Auto-generated method stub
      return "Hello world!";
    }

  }
After
  public class Greeting {

    private String message;

    public Greeting(String message) {
      this.message = message;
    }

    public String getMessage() {

      return message;
    }

  }
As a result of the above refactoring, the test has been changed as well.
The Test
Before
  @Test
  public void test(){

    Greeting greeting = new Greeting();

    assertThat(greeting.getMessage(), is("Hello world!"));
  }
After
  @Test
  public void test(){

    Greeting greeting = new Greeting("Hello world!");

    assertThat(greeting.getMessage(), is("Hello world!"));
  }
Refactoring the Test
When it comes to refactoring TESTS, you got to turn your back on some of the BEST PRACTICES that you follow when you write production code. Because,
GOOD TEST CODE != GOOD PRODUCTION CODE
You got to break some rules here. So, don’t start refactoring your tests before you read these rules of thumb.
RULES OF THUMB ![]()
For refatoring unit tests
-
Magic numbers are actually GOOD.
-
Do REPEAT yourself (wherever it makes sense).
-
Extra-long method names are OK.
-
Abstraction is no good, make it simple and straight forward as much as possible.
For more details on these rules, check out this post on Why Good Developers Write Bad Unit Tests
Looking at the rules above, you might think, is there anything left for refactoring in the unit test?
Well, in my experience there is always something/s that you can do to make it better.
-
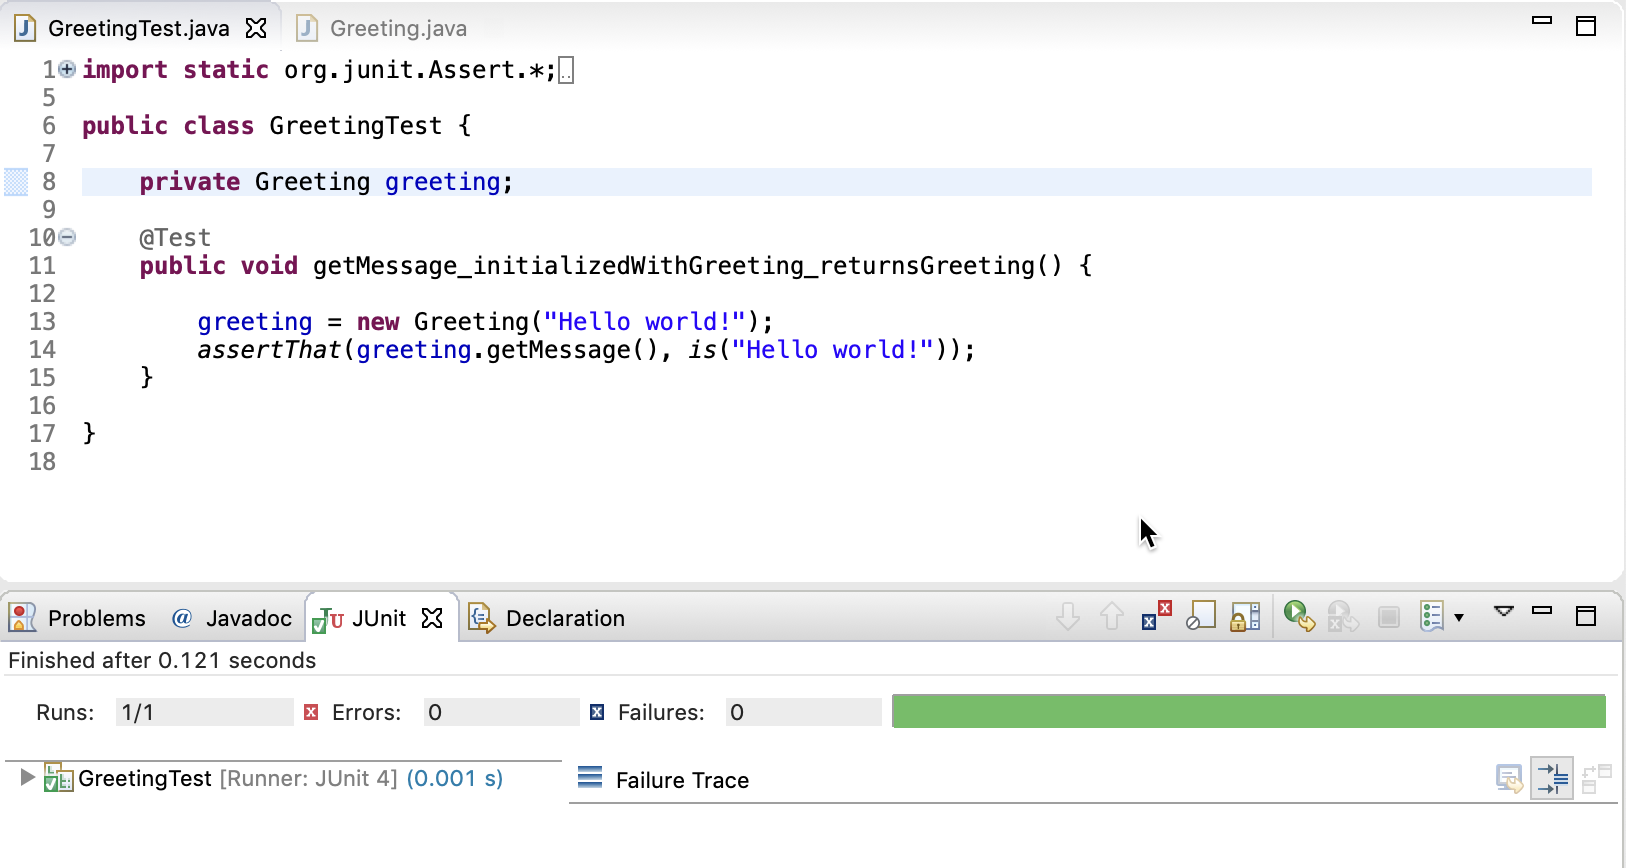
Now for this Test, I can extract the local variable into a field, so that it can be used in other tests of the same class.
You can go one step further and move the initialization of the field to a setUp method which would run before every test method. But I’m going to stop here for this example.
Checkout my JUnit4 Tutorial, if you want to know how to use
setUpandtearDownmethods in JUnit4. -
Then the next important thing is the name of the test.
I’m following the naming convention introduced by Roy Osherove, which is excellent.
Naming convention for test methods
UnitOfWork_StateUnderTest_ExpectedBehaviour
methodUnderTest_state_expectedBehaviour
eg: getMessage_whenInitializedWithGreeting_returnsGreeting
Refacoring Of The Test
Before
  public class GreetingTest {

    @Test
    public void test(){

      Greeting greeting = new Greeting("Hello world!");

      assertThat(greeting.getMessage(), is("Hello world!"));
    }
  }
After
  public class GreetingTest {

    private Greeting greeting;

    @Test
    public void getMessage_whenInitializedWithGreeting_returnsGreeting() {

      greeting = new Greeting("Hello world!");
      assertThat(greeting.getMessage(),
          is("Hello world!"));
    }

  }

TDD DEMONSTRATION
Now you have a basic idea of what is involved.
But there’s nothing like watching how it’s done practically.
So let’s see it in action!

HELLO WORLD IN TDD
1 | Writing the test
2 | Implementation
Writing the minimum code in order to pass the test
3 | Refactor
Refactoring implementation
Refactoring test
It’s that simple. So what’s keeping you from practicing TDD? Let’s get started.
For the majority of us who are so used to writing the method or function first and writing the unit tests later or maybe skipping it altogether, it may feel like swimming upstream.
But like anything, a bit of practice will make it a lot easier and natural.
Following are a few things that motivated me and also planted the foundation of TDD in me.
-
Test Driven Development: By Example” by Kent Beck - Reading this book, set my mind up for it and it really extracts the essence of test driven development.
-
Writing great unit tests i.e. simple, understandable, and maintainable unit tests.
-
TDD Kata - Small practice exercises that help you master it.
QUALITY MATTERS
What is a GOOD TEST?
What is a BAD TEST?
Why should I strive to write GOOD Tests?

Yes, the quality of unit tests does matter as much as the quality of production code.
Some qualities of a GOOD unit test
- Each unit test should be able to run independent of other tests.
- Each test should test just one thing (single behaviour, method, or function)
- All external dependencies should be mocked.
- The assumptions for each test should be clear and defined within the test method.
- name of the test method should be meaningful.
- Unit tests should be fast so that it could be run as often as required.
Why it’s so important to write good unit tests?
Short answer: BAD unit tests are not going to last long.
Long answer: If unit tests are of low quality, or in other words, if a unit test meets one or more of the following conditions,
- Tests are not easily understandable by a person other than the one who wrote it.
- Tests interdepend on each other causing multiple tests to fail if one test is broken.
- Unit test suit take ages to run
- … (the list goes on)
Maintaining those unit tests would become a nightmare in the long run.
Ultimately it would lead to ignoring all the tests one by one as they fail.
Don’t believe me?
Then you may want to read this open letter from an ignored test
Power of having good unit tests
- Allows merciless refactoring - extremely rewarding.
- Gives you instant visual feedback - oh that green light

- Helps document the specification effectively.
- Guides the design of the production code (especially when TDD is practiced).
- Maintaining the production code will be a breeze.
- Others will be so grateful that you wrote those unit tests
 (trust me
  )
)
That being said, you should not overdo it, because it takes time and effort to maintain unit tests.
TDD really helps in that aspect as well, because when you do it the other way around (i. e. write the code and then try to unit test it), you could easily end up having unnecessary tests.
TDD KATA
Practice makes Perfect!
How to build that TDD muscle?

Like anything, the key to TDD is practice.
But how do you practice?
TDD KATAs to the rescue.
KATA has its roots in Japan.
“KATA means a detailed or defined set of movements to be practiced over and over again.”
TDD Kata is a tiny bit of coding that you could repeat over and over again.
Not a new one every day, but the same coding exercise until you get sick of it.
So, head over to this repository where you can find a list of Katas to practice and start now.
Want to learn how TDD is done in a Spring Boot application?
Check out the following course.
In this course you will learn how to write unit tests before implementing a single line of bussiness logic, and also how to write seperate integration tests, while building a REST API with Spring Boot.
